Adorable Amigurumi Otter: Free Crochet Pattern with a Tiny Seashell
Crochet your own charming amigurumi otter with this free step-by-step pattern! Featuring a sweet floating pose and a tiny seashell accessory, this pattern is perfect for nature-themed decor and gifts. Keywords: amigurumi otter pattern, free crochet otter, otter with seashell, beginner amigurumi pattern.
Bu Yazımızda Neler Var :
Welcome to Inspire & Create! 🧶
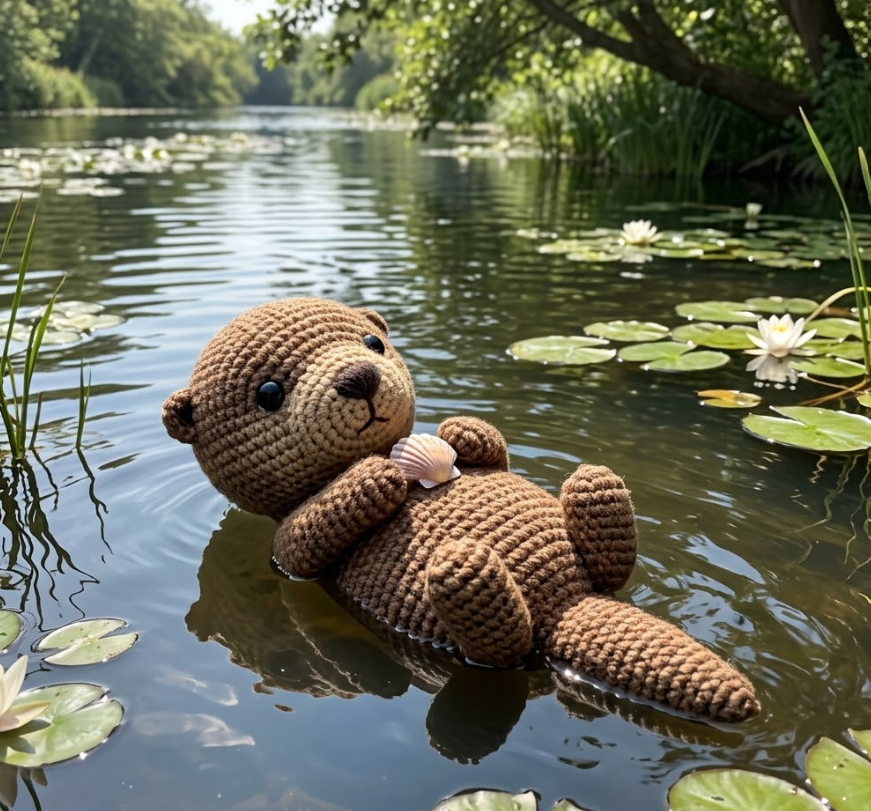
Hi there, lovely maker! We’re so happy to have you back for another fun project. Today’s creation is full of charm — a sweet little otter floating on its back, holding a tiny seashell just like real otters do in the wild. Let’s get hooking!
How to Crochet an Amigurumi Otter: Step-by-Step Pattern
What You’ll Need
Materials
- Brown or tan yarn (body, head, limbs)
- Cream or light beige yarn (face, belly, paws)
- Small amount of pink yarn (nose, cheeks)
- White or pale yarn (seashell)
- 3.5mm crochet hook
- Polyester fiberfill stuffing
- Safety eyes
- Yarn needle
- Black embroidery thread (nose, mouth details)
Skill level: Beginner to intermediate
Finished size: Approximately 5 inches long
Step 1: Crochet the Head (Brown Yarn)
- Round 1: 6 sc in magic ring (6)
- Round 2: inc in each st (12)
- Round 3: sc, inc repeat (18)
- Round 4: sc 2, inc repeat (24)
- Round 5: sc 3, inc repeat (30)
- Rounds 6-10: sc around (30) — 5 rounds even
- Insert safety eyes around round 7, spaced 7-8 sts apart
- Round 11: sc 3, dec repeat (24)
- Round 12: sc 2, dec repeat (18)
- Stuff firmly
- Round 13: sc, dec repeat (12)
- Round 14: dec around (6)
- Fasten off, close hole
Step 2: Crochet the Face Patch (Cream Yarn)
- Ch 2, work a wide oval in rows: 3 sc in 2nd ch from hook, inc each end every other row up to about 12 sts wide, work even 3-4 rows, then dec back down
- Sew onto the lower-front of the face, framing the area below and around the eyes
- Embroider a small black triangle nose at the top of the patch and a simple mouth line below it
Step 3: Crochet the Ears (Brown Yarn, Make 2)
- Round 1: 5 sc in magic ring (5)
- Round 2: sc around (5)
- Flatten and sc closed
- Sew to the top of the head, close together and slightly forward, since otters have small, rounded ears set low on the head
Step 4: Crochet the Body (Brown Yarn)
Since this otter will be posed floating on its back, the body is worked as a slightly flattened oval rather than a tall rounded shape.
- Round 1: 6 sc in magic ring (6)
- Round 2: inc around (12)
- Round 3: sc, inc repeat (18)
- Round 4: sc 2, inc repeat (24)
- Rounds 5-11: sc around (24) — 7 rounds even
- Round 12: sc 2, dec repeat (18)
- Stuff firmly
- Round 13: sc, dec repeat (12)
- Round 14: dec around (6)
- Fasten off, close hole, sew to head
Step 5: Add the Cream Belly Patch
- Ch 2, work a long oval in rows: 3 sc in 2nd ch from hook, inc each end every other row up to about 10 sts wide, work even 6-7 rows, then dec back down
- Sew onto the front of the body from chest to tail end — this will be the “up” facing side when posed floating on its back
Step 6: Crochet the Front Paws (Cream Yarn, Make 2)
- Round 1: 6 sc in magic ring (6)
- Rounds 2-4: sc around (6) — 3 rounds
- Flatten and sc closed
- Sew to the upper sides of the body, positioned so they can rest together on the belly (as if holding something)
Step 7: Crochet the Back Legs/Flippers (Brown Yarn, Make 2)
- Round 1: 6 sc in magic ring (6)
- Round 2: inc around (12)
- Rounds 3-5: sc around (12) — 3 rounds
- Flatten into a wide paddle shape and sc closed
- Sew to the lower sides of the body, angled outward like flippers
Step 8: Crochet the Tail (Brown Yarn)
- Round 1: 6 sc in magic ring (6)
- Rounds 2-8: sc around (6) — 7 rounds
- Round 9: dec twice, sc rest (4)
- Flatten slightly and sc closed
- Sew to the back of the body, allowing it to curve naturally to one side
Step 9: Make the Tiny Seashell
- Round 1: 6 sc in magic ring (6)
- Round 2: inc around (12)
- Round 3: sc, inc repeat (18)
- Round 4: sc around (18)
- Fasten off — flatten slightly into a small disc shape
- With a contrasting white or cream strand, work a few short surface crochet ridge lines from the center out to the edge for a scalloped shell texture
- Stuff very lightly if you’d like a bit of dimension, or leave flat
Step 10: Attach the Seashell
- Position the seashell between the otter’s front paws, resting on the cream belly patch
- Sew or tack the paws gently around the edges of the shell so it looks like the otter is holding it in place
Step 11: Finishing Touches
- Embroider small pink cheek circles below the eyes with embroidery thread
- Weave in all loose ends
- Gently shape the body and tail into a relaxed, floating curve
Tips for the Perfect Amigurumi Otter
- Keep the body slightly less firmly stuffed than usual for a softer, more relaxed “floating” silhouette
- A light gray or silver-brown yarn also works beautifully for a sea otter look, as opposed to a warmer brown for a river otter
- This pattern pairs nicely with a tiny crochet or felt water ripple base for display, giving the impression the otter is resting on water