Dark Green Nails with Gold Foil Flakes: Step-by-Step Tutorial
Want a rich, autumn-inspired manicure? This step-by-step guide shows you how to shape, paint, and add scattered gold foil flake accents to deep green almond nails on natural nails. Keywords: dark green nails tutorial, gold foil nail art, autumn manicure DIY, almond nail shape gel polish.
Bu Yazımızda Neler Var :
Welcome to Inspire & Create! 💅
Hi there, lovely reader! We’re so happy to have you back for another nail art tutorial. Today’s design is rich, elegant, and perfect for the season — deep green almond nails with delicate scattered gold foil flakes. Let’s get started!
Dark Green Gold Foil Nails: Full Tutorial
What You’ll Need
Materials
- Nail file and buffer
- Cuticle pusher and cuticle nippers
- Nail prep solution (isopropyl alcohol, 70-99%)
- Primer (acid-free bonding primer)
- Base coat (gel)
- Dark green gel polish (deep forest/hunter green)
- Gold leaf foil flakes (loose foil flake type, not transfer foil)
- Foil adhesive gel or clear “no-wipe” tacky top coat
- Tweezers or a slightly damp dotting tool (for placing foil flakes)
- Small angled brush or fan brush (for sweeping flakes)
- Top coat (gel)
- UV/LED nail lamp
- Lint-free wipes
- Cuticle oil
Skill level: Beginner to intermediate
Time required: 55-70 minutes
Step 1: Shape Your Natural Nails
- Wash and dry your hands thoroughly
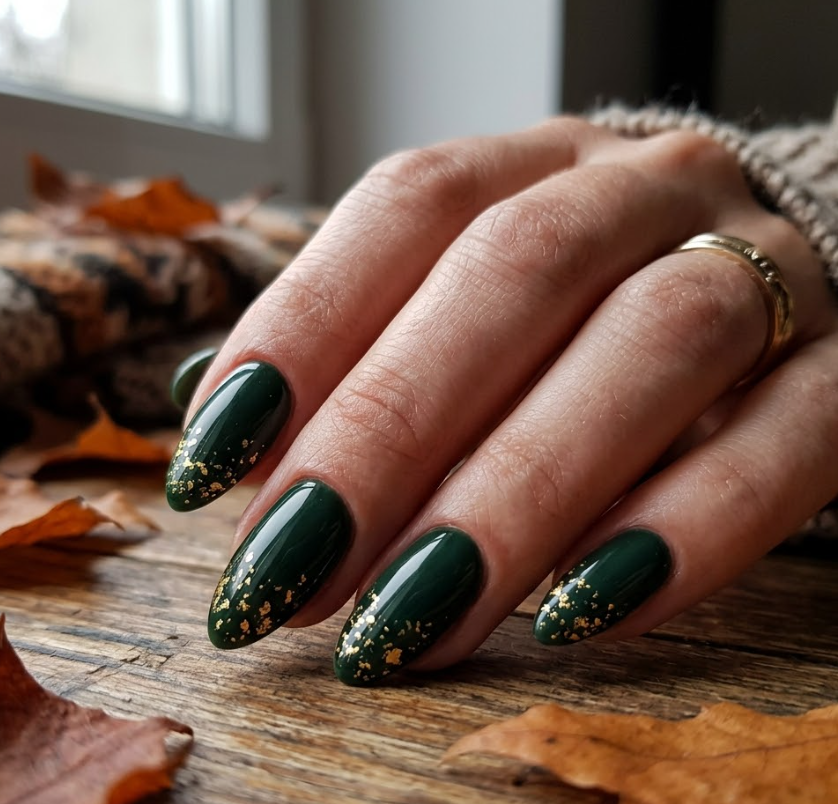
- File each nail into a long almond shape — tapering the sides into a smooth, elongated point at the tip, as shown in the reference photo
- This design works well with tip extensions if you want extra length and a more dramatic almond curve
- Buff the surface lightly to smooth ridges
Step 2: Cuticle Care
- Push back cuticles gently with a cuticle pusher
- Trim only loose, excess cuticle skin with nippers
- Buff the nail surface again lightly to remove shine
Step 3: Cleanse and Prep
- Wipe each nail thoroughly with isopropyl alcohol on a lint-free pad to remove oils and dust
- Apply a thin coat of acid-free bonding primer to each nail, avoiding the cuticle and skin
- Allow to air dry for 30-60 seconds — do not cure under UV light
Step 4: Apply Base Coat
- Apply a thin, even layer of gel base coat to each nail, capping the free edge
- Cure under the UV/LED lamp for 30-60 seconds
Step 5: Apply Dark Green Gel Polish
- Apply a thin, even first coat of dark green gel polish, capping the free edge
- Cure under the UV/LED lamp for 30-60 seconds
- Apply a second coat for full, rich opacity — deep colors often look slightly uneven after one coat
- Cure again for 30-60 seconds
- If the color still looks streaky, apply a thin third coat and cure again for 30-60 seconds
Step 6: Plan Your Foil Flake Placement
Looking at the reference photo, the gold foil flakes are concentrated near the tip of each nail and along one side, fading out toward the cuticle — similar to an ombre effect but with scattered flakes instead of glitter. The placement is asymmetrical and looks most natural when it’s denser on one side of the nail and sparser toward the center/other side.
Step 7: Apply Adhesive for Foil Flakes
- Apply a thin layer of foil adhesive gel or no-wipe tacky top coat to the area of the nail where you want the foil flakes — typically the tip and one side, covering roughly the bottom third to half of the nail
- Cure under the UV/LED lamp for 30-60 seconds
- The surface should remain slightly tacky to the touch — this is what the foil flakes will stick to
Step 8: Apply the Gold Foil Flakes
- Using tweezers or a slightly damp dotting tool, pick up small pieces of gold foil flake
- Gently press the flakes onto the tacky area of the nail, concentrating more flakes near the very tip and gradually placing fewer flakes as you move toward the center of the nail for a natural fade
- Vary the size and shape of the flakes you use — a mix of larger and smaller pieces creates a more organic, scattered look
- Continue until you’re happy with the density and placement, referring to the reference photo for the fade pattern
Step 9: Press and Set the Flakes
- Once flakes are placed, gently pat them down with a clean fingertip or soft brush to ensure they’re fully adhered to the tacky surface
- Use a small angled or fan brush to lightly sweep away any loose flake fragments that aren’t fully stuck, keeping the design clean
Step 10: Seal Everything with Top Coat
- Apply a generous, even layer of top coat over the entire nail, fully encapsulating the foil flakes — this is important since foil flakes can lift or catch on things if not properly sealed
- Cure under the UV/LED lamp for 60 seconds
- If any flakes still feel slightly raised or textured, apply a second layer of top coat and cure again
- Wipe each nail with a lint-free pad and alcohol to remove any tacky residue, revealing a smooth, glossy finish
Step 11: Finishing Touches
- Apply cuticle oil around the nail edges and massage into the surrounding skin
- Wash hands gently to remove any remaining flake fragments
- Admire your dark green nails with their elegant scattered gold foil accents!
Tips for the Perfect Foil Flake Design
- Gold foil flakes work with tweezers best when slightly static — rubbing the tweezers on fabric beforehand can help them pick up flakes more easily
- Less is often more with foil flakes — a few well-placed pieces look more elegant than an overly dense application
- This color and technique combination is especially popular for autumn and winter, but gold foil also pairs beautifully with deep burgundy, navy, or black bases
- If flakes shift during top coat application, use a clean dry brush to gently nudge them back into place before curing
Thank you so much for joining us for this rich autumn nail tutorial! We hope this deep green and gold foil design adds an elegant, seasonal touch to your hands. For more step-by-step beauty and craft tutorials, visit us at Inspire & Create | Bringing Imagination to Life. Until next time, happy painting! 🍂💅
Keywords: dark green nails tutorial, gold foil nail art, autumn manicure DIY, almond nail shape gel polish, foil flake technique, gel nails at home, fall nail design, elegant nail art